Spinnaker Authentication with Keycloak
Spinnaker Authentication with Keycloak
In my previous story I explained how I deployed Spinnaker onto Kubernetes and enabled public access via ingress. In this short story I’m going to explain how I secure Spinnaker by enabling authentication with Keycloak.
For this demo I used Kubernetes running on my Mac and also I’m not going to explain OAuth 2.0, OpenID Connect, all the features of Keycloak.
Keycloak
Keycloak is an Open Source software for Identity and Access Management. It is developed on the top of Wildfly server. It provides support for standard protocols like OpenID Connect, OAuth 2.0, and SAML.
Authentication
Spinnaker authentication involves three main components. They are,
- Deck : Sinnaker UI. That is what you see when you access spinnaker.
- Gate: API gateway for Spinnaker. All the requests go through the Gate and check whether the request is coming from authenticated user.
- Identity Provider: In our case this is Keycloak.

There are several option that we can configure our identity provider.
For this, we are going to use OAuth 2.0/OIDC.
Configure Keycloak
For this demo, I’m going to use Master realm. First, we have to create a Client for Spinnaker. The client is a trusted browser app or service.

When we create a client we have to give a unique id for the client. Then we have to select openid-connect as Client protocol. Root URL should be our Spinnaker URL. When we click save, we will get a lot of other options to configure. Then we have to configure a Valid Redirect URI. This is the URI that Keycloak redirects users when the authentication is completed successfully. This should be our Spinnaker gate public URI.

Then we have to change the Access Type to confidential. When we save this we will get new tab called Credentials. What is important here is the Secret. Keycloak use this secret to verify this client. Later when we configure Spinnaker we are going to use this as its secret.

Crate User
Our next step is to create a user to login to the Spinnaker. In order to do that click Users tab in Manage section. Then click Add user button. Fill all the necessary details.
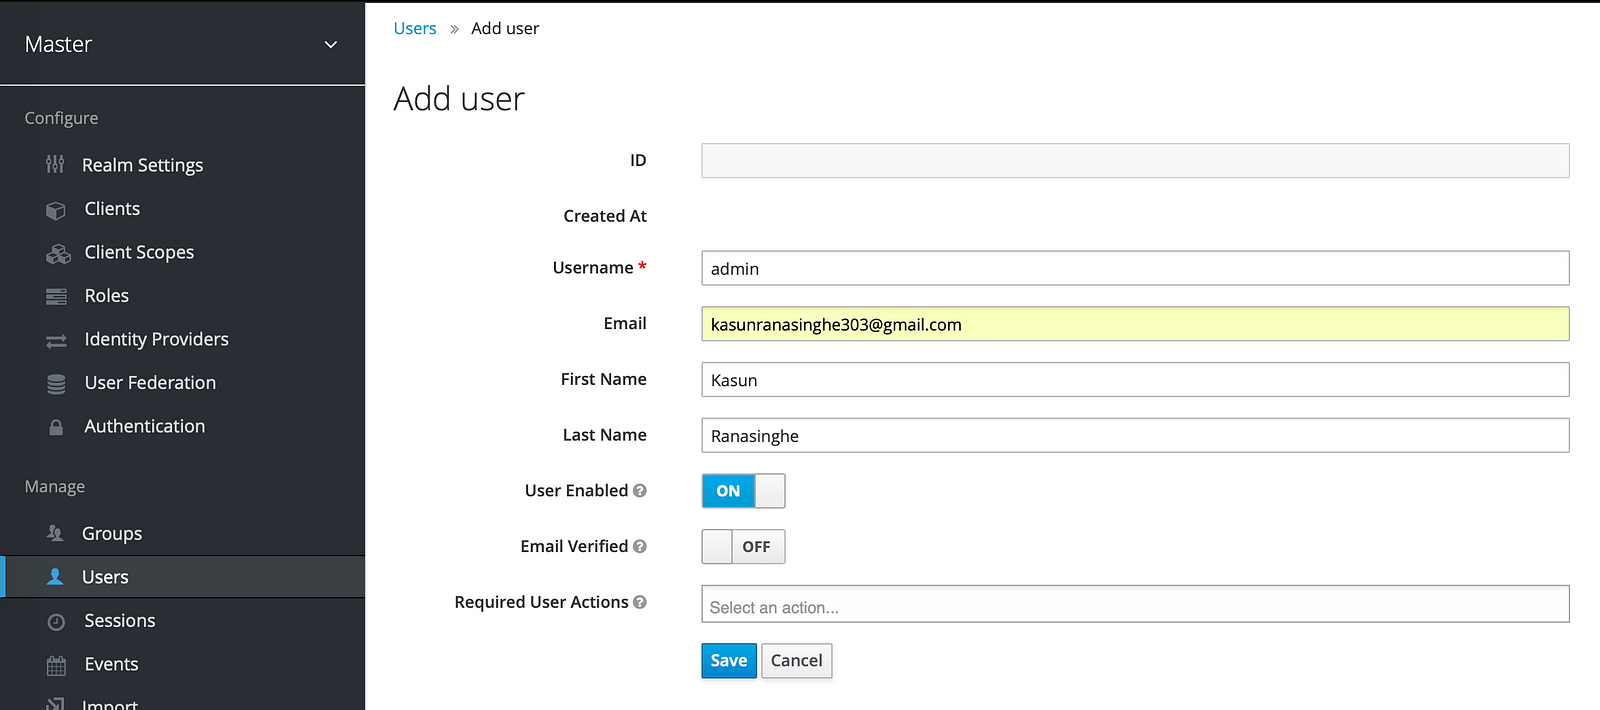
When you save the user you will get a new tab called Credentials. Enter a new password for this user then click Reset Password button.

Configure Spinnaker
To enable authentication we are going to add some configuration to Spinnaker Gate. In Halyard, we can create a custom profile for Spinnaker and provide custom configurations. For this demo I’m going to use default profile. You can find that in $HOME/.hal/default/profiles directory . In order to add a custom configuration to Gate we have to create a file called gate-local.yml in Halyard default profile. The configuration file looks like below.
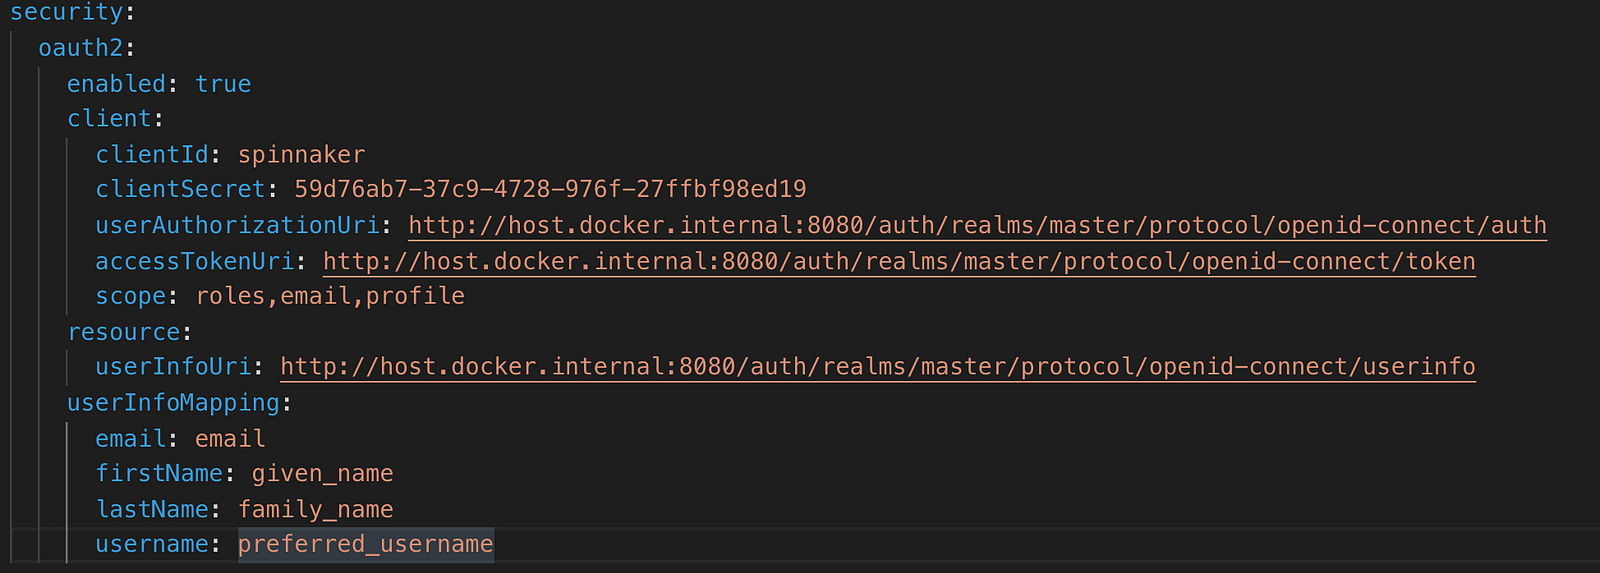
Key important things in this configuration are,
- clientId : That is the client id that we gave when we created Spinnaker client in Keycloak
- clientSecret : This is the secret generated by Keycloak for Spinnaker client.
- userAuthorizationUri : Keycloak user authorization URI.
- accessTokenUri : Keycloak token URI
- userInfoUri : Keycloak user info URI
UserInfoMapping
The
userInfoMapping field in the configuration is used to map the names of fields from the userInfoUri request to Spinnaker-specific fields. Keycloak user profile looks like this,{ "preferred_username": "Kasun", "email": "kasun@mail.com", "given_name": "Kasun", "family_name": "Ranasinghe" }
Our
userInfoMapping should look like:userInfoMapping: email:emailfirstName:given_namelastName:family_nameusername:preferred_username
After that, we can apply this configuration.
hal deploy apply
When we access Spinnaker we will be redirected to Keylocak login page.
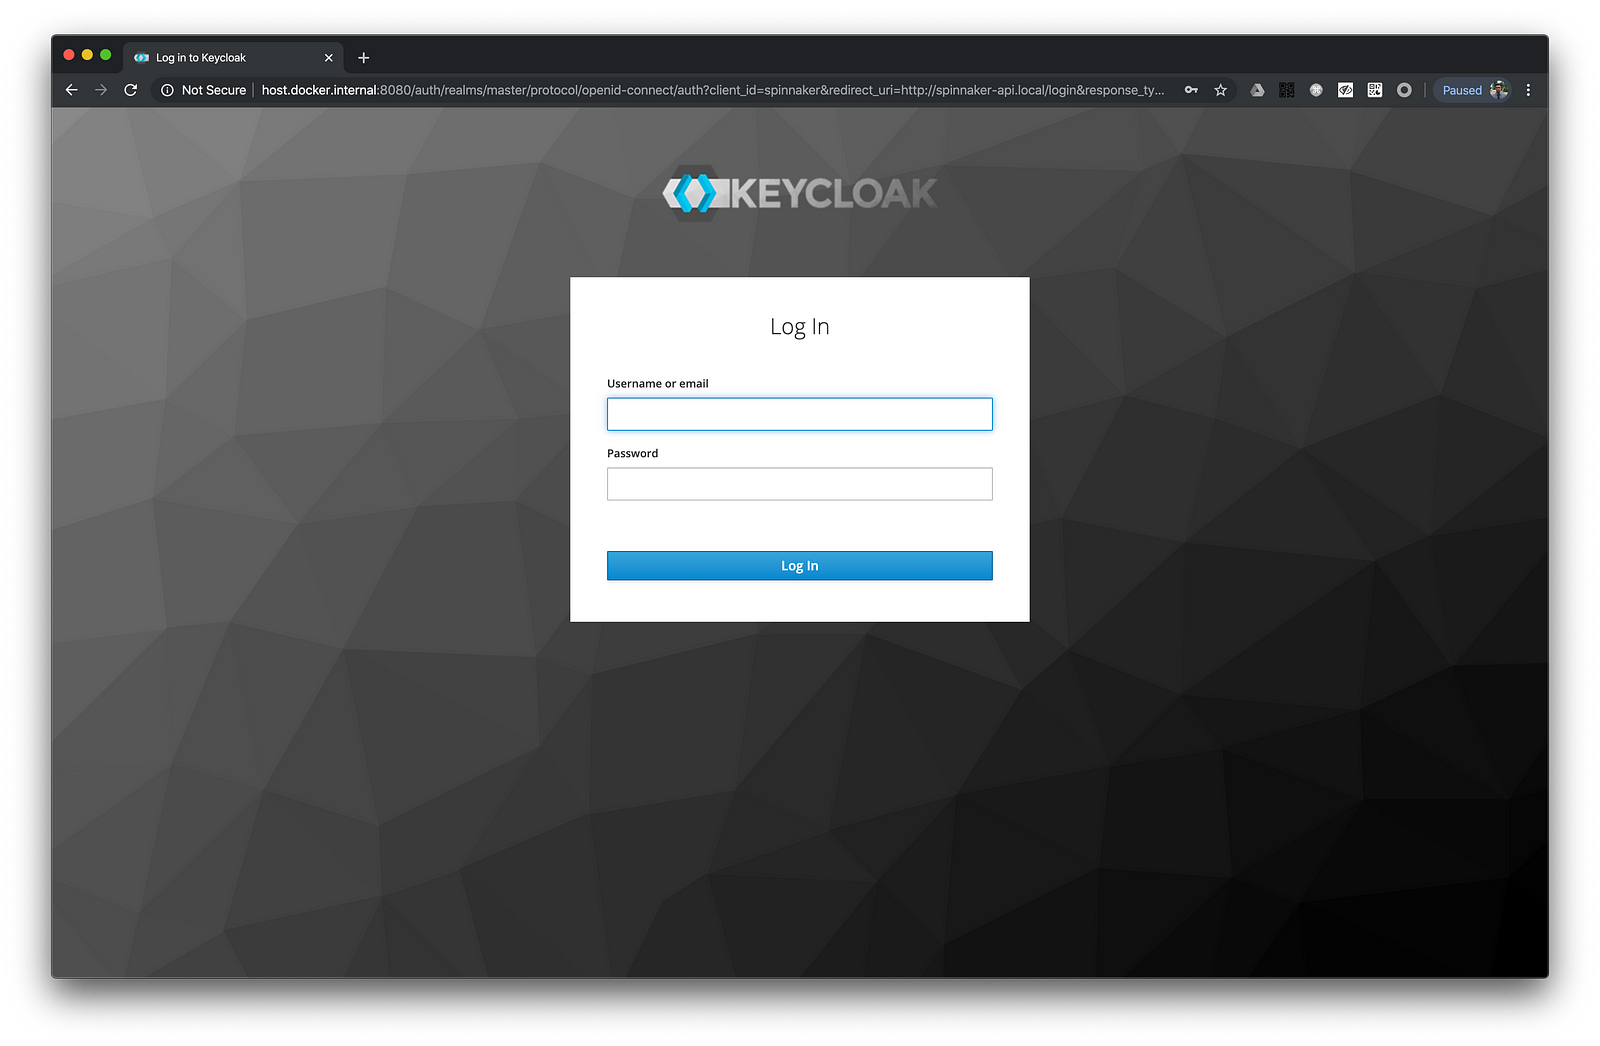
When we enter login details of the user we created we will be redirected to Spinnaker home page. In Spinnaker we can see the username of the logged in user next to the search field.

All the actions performed in the Spinnaker will be recorded against logged in user. For example, if we execute a pipeline, the username of the user who executed this pipeline, will be displayed against that.

There are many ways to enable authentication in Spinnaker. My effort here was to demonstrate a way by using Keycloak. The importance of using Keycloak is we use our own hosted Identity provide in place of Identity provider managed by another. And also we will be unable to use providers such as Google Apps for Work / G Suite ,GitHub, Azure due to company policies.
Comments
Post a Comment